Shop great deals on our online store! Shop now
Resources
BUILDING THE DREAM - VINYL SWIMMING POOL CONSTRUCTION
June 15/2020
A common reaction when people see the pools we have built is, "Wow, that's incredible," or, "That's my dream backyard." Yet, what's even more incredible is seeing the transformation from a bare plot of grass into a dream oasis. A lot of planning and preparation go into each project we take on. In this blog we'll examine the basic process of vinyl pool construction. (Vinyl pool construction is somewhat different from fiberglass or concrete pools)
Having a master plan to work from is so important. With a clear plan every trade involved can work off of the same measurements toward the final goal and the vision is clear. That being said, there are many steps that contribute to the finished product. We'll cover a few highlights of the project so you know what to expect.
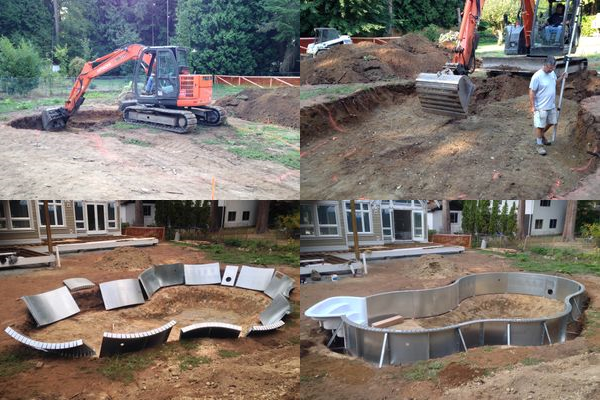
1. Once the permit application has been approved by the city the pool can be plotted out according to the plans submitted. This is typically done with spray paint markings shortly before the excavation takes place.
2. Excavation can now begin according to the engineered drawings. The hole is usually over-dug by about 2' to allow for plumbing and backfill. In most cases the material will need to be trucked away from the property to a dump site.

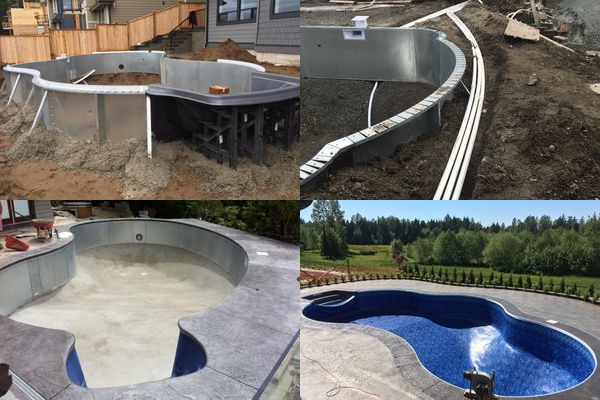
3. Galvanized steel wall panels are then bolted together and the a-frame supports can be attached. This provides the main structure of the pool itself. The pool can then be leveled and squared.
4. A cement collar around the base of the walls is poured to provide structural support. It is left unfinished as it will soon be covered with fill material.

5. At this stage the pool can be backfilled with sand or gravel to the top pf the pool wall. The plumbing can be run from the fittings on the pool to the location of the pool equipment. The concrete deck can be poured once the ground has been prepared and graded.
6. The pool bottom can now be shaped to specifications and a grout layer of sand and concrete is hand troweled to provide a smooth finish for the vinyl liner to sit on.
7. The vinyl liner is installed using a powerful vacuum that sucks it into place. Once the liner is properly fitted the pool is filled with water.
Other steps may be taking place simultaneously such as installation of the pump, filter and heater. The electrical and gas can also be run to the equipment pad. Fencing should be installed as per the local building code prior to water be added to the pool. Various inspections may also take place through out the project by the city and engineers.
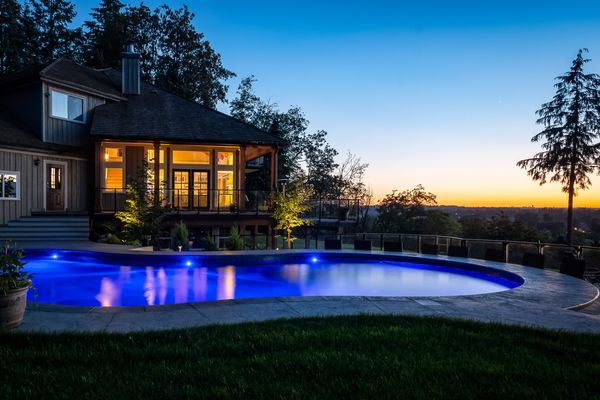
After several weeks of tedious work the dream comes to life and landscaping can be completed. Let the swimming begin!

We've outlined the basic steps involved on a typical vinyl pool build, but a lot of thought can go into details such as lighting, water features, automation, energy efficient equipment, and sanitation options. Additional features like a hot tub, gazebo, or a fire table can really make the outdoor living space more comfortable and useful. If you would like to explore your options for a dream backyard reach out to us today. We don't just build pools. We make backyard memories.
Book all of your Service needs Online!
Discover Now
Swimming Pool and Hot tub sales, service and installation. We offer a wide variety of pool pumps, filters, heaters, cleaners, liners, covers and much more. We are your best sources for swimming pool and hot tub accessories and supplies. Our mission is to provide high quality products and service at competitive prices. We are your premier Swimming Pool builder. Come visit our showroom.
Come Visit Us
Mon. to Fri. 10am - 5pm
Saturday 10am - 4pm
Closed
Saturday 10am - 4pm
Closed
Copyright © Blue Wave Pools. All rights reserved.
Privacy Policy |
Terms and Conditions |
Sitemap
Powered by Forinsite Insite Suite
Powered by Forinsite Insite Suite


